Automation
Applications and Access Tokens
If you want to use the S1SEVEN API, you need to create an application on the S1SEVEN platform to receive access tokens.
Create an Application
- Go to Automate › Applications
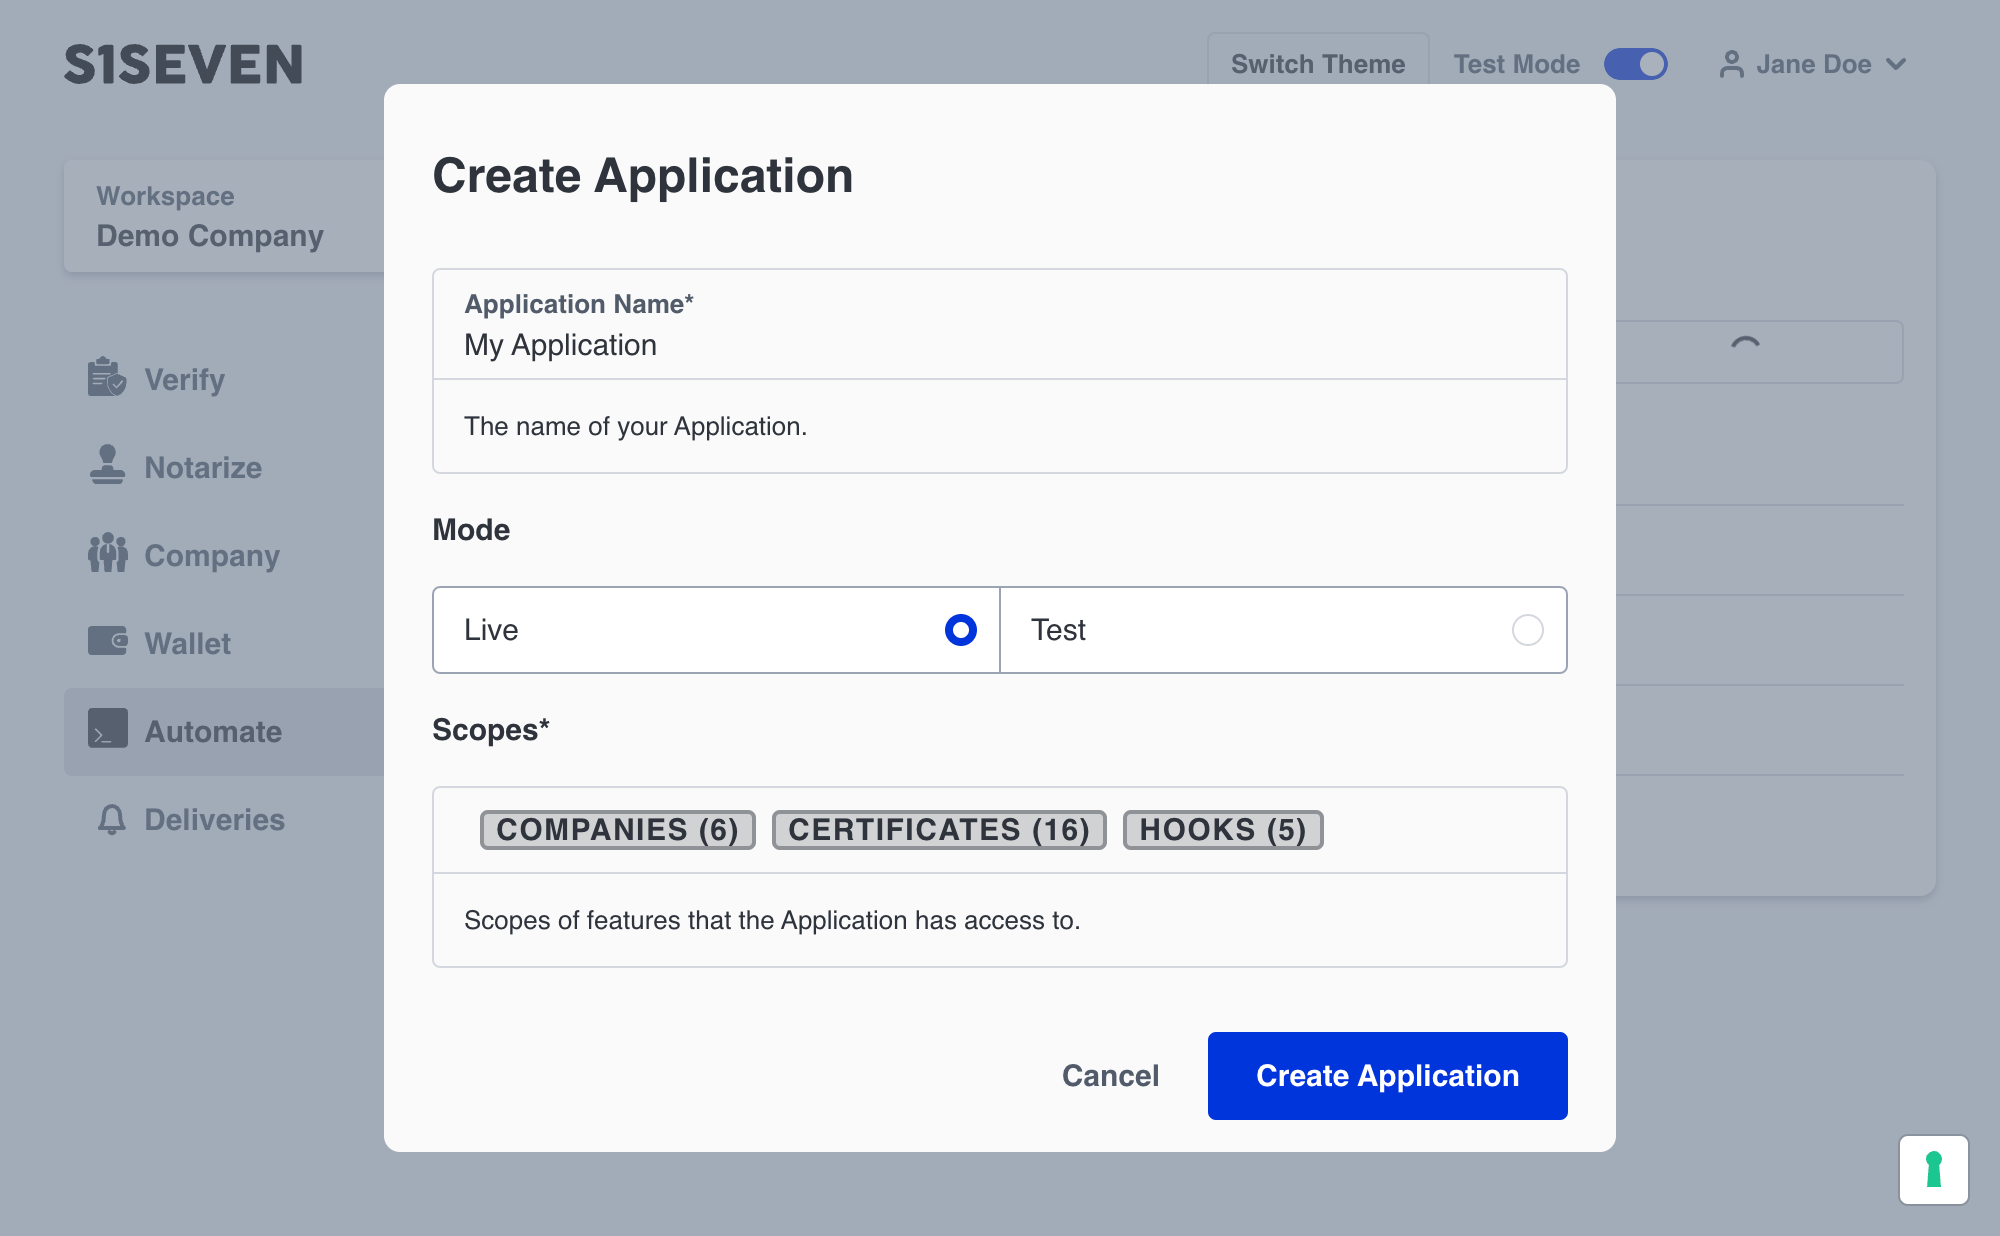
- Click Create Application — a modal will open
- Provide a name, select mode
testorliveand scopes for your application. - Click Create Application
TIP
The Mode determines the target Blockchain network on which notarizations are stored.
You have successfully created an application! You are now presented with the application’s details. You can find the Application ID, the Client ID and the Client Secret in the General section. These values are needed to generate an access token using the API.
Rotate a Client Secret
If your client secret has been compromised or you want to rotate it as a security practice, you can generate a new one.
- Go to Automate › Applications
- Click on the name of your application to enter the application’s details.
- Click Rotate Secret
The new client secret is displayed once. Make sure to store it securely — the previous secret is invalidated immediately.
Generate an Access Token
Access tokens are used to authenticate your service with the S1SEVEN API. You can generate an access token using the API or using the S1SEVEN platform. Keep in mind that access tokens have a limited lifetime.
- Go to Automate › Applications
- Click on the name of your application to enter the application’s details.
- Navigate to the M2M Access Token tab
- Click Generate Access Token
You have successfully generated an access token! You are now presented with the access token. Make sure to keep it safe.

OAuth2 Client Credentials
If you prefer a standard OAuth2 client credentials flow, you can use the POST /tokens/oauth2 endpoint. This accepts the same credentials as the regular token endpoint but uses the standard OAuth2 naming conventions:
{
  "client_id": "your_client_id",
  "client_secret": "your_client_secret",
  "grant_type": "client_credentials"
}
The response follows the OAuth2 token response format:
{
  "access_token": "...",
  "token_type": "Bearer",
  "expires_in": 86400
}
Webhooks
Webhooks allow external services to be notified when certain events happen. We’ll send a POST request to each of the URLs you provide. To set up a webhook, open the Developers section and click on Webhooks.
Click on Add webhook, add a Payload URL, Secret, choose a Mode, and choose the events that will trigger the webhook.
TIP
This secret is used to sign the payload and allows you to verify that S1SEVEN is the one sending the request.
For further details, please take a look at our developer documentation
Mailhooks
Mailhooks trigger emails on certain events. We send you an email with data on the event. To set up a mailhook, open the Developers section and click on Mailhooks. Add a Recipient email address, choose the Mode, and choose the events that will trigger the mailhook.
Then click Save, and you will see your mailhook has been added to the list of mailhooks.
Mailhook use cases
Mailhooks can currently be configured to send you data via email automatically when one of the following events is triggered:
- when a
companyis updated - when an
access tokenis created or updated - when a
walletis created, updated or deleted - when an
identityis created or notarized - when a
transactionis signed or sent - when a
certificateis notarized or received - when a
hookis created, updated or deleted - when a
mailhookis created, updated or deleted
For example, a mailhook triggered by the identities:create_one event will send you an email.
Using a Microsoft Exchange Server?
Don't forget to add our email sending address to the list of accepted senders. You can find the sender address in the Mailhooks User Interface (UI).